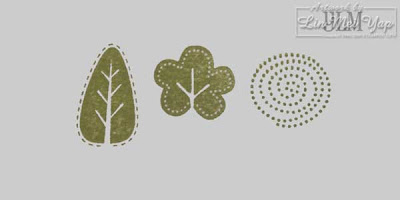
I'm sure many of you will already use vellum sheets in place of the Stamp-A-Ma-Jig's reusable imaging sheet. Another advantage of using vellum sheets is that you can create composite images on them ... which is the answer to my Tricksy Trendy Trees troubles. Stamp all four foliage images on a vellum sheet.
I mark the corners of the vellum sheet with an "L" to mark the short and long sides of my Stamp-A-Ma-Jig. This informs users of the sheet as to how to orient my SAMJ in relation to the sheet. Stamp the corresponding trunk in the desired position onto the vellum sheet using an imaging sheet and Stamp-A-Ma-Jig. I recommend using a lighter ink colour so that you will easily recognise that the vellum guide is for the foliage.
 You can now use the vellum guide to stamp some foliage with full knowledge of where their trunks will end up when they are eventually stamped.
 So, here are all the trees complete with their trunks evenly spaced and in a straight line. Yay!
Sunday, May 31, 2009
Two Step Stamp-A-Ma-Jigging
Those Tricksy Trendy Trees
I promised my newsletter readers that I would post a tutorial this month...and boy! am I cutting it fine! But here it is.
Stampin' Up! included the very cool Trendy Trees stamp set in our Convention bags this year. Whilst this is a terrific set as it is versatile and sports a couple of great sentiments, it is also really tricky to use. This is especially true if you are a liner-upper even-spacer nut like me.
When I first used Trendy Trees, I had the following experience: I spaced out my trees using my Stamp-A-Ma-Jig based on the foliage. I lined up the tops of the first two trees and left the rightmost one a little lower as I could play with its trunk height.
 Then I added the trunks using my SAMJ and...Wha? The trunks are all over the place instead of being lined up. That just won't do! I'll have to line up the trunks instead!
  I drew a line so that there'd be no mistake in the trunks being stamped in a row and used a Stamp-A-Ma-Jig for insurance. Admiring the neatly spaced tree trunks, I felt rather chuffed.
 I then stamp the foliage and, to my horror, the foliage overlapped. Nooo you Tricksy Trendy Trees! May it be winter forever so that your branches remain bare and I never have to deal with this ever again! *sob*
Hmmmm... so what to do?
Friday, May 22, 2009
Lin Mei's May Maybe Malaise
That about sums up my May. Maybe or maybe not. Mostly maybe not...maybe. If I keep this up, "maybe" is not going to look correctly spelt and this post may just end up on the list of maybes. Yup! That's done it ... "maybe" looks completely wrong now. Maybee it needs an extra "e"... Not! *sigh*
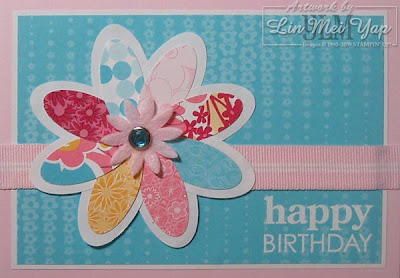
I hosted this month's INKlings Cyberstamp and, being a little stamped out after Convention swaps, nominated as the first challenge to make a card that featured Designer Series Paper mainly. With this month's DSP promotion, I was feeling like I could actually USE my DSP for once as there's still time to buy more on sale if I really messed up... Stampin' Supplies
Ink:
VersaMark
Stamp sets:
More Thoughts
Paper:
Pink Flamingo DSP
Piroutte Pink
White copy
Accessories:
Felt Fusion Too
Heat Tool
Ice Circle RS Brads
Oval Punch
Pink Piroutte Striped Grosgrain Ribbon
Small Oval Punch
White Embossing Powder
Monday, May 11, 2009
Too late for Mother's Day
this year...Maybe I'll keep it for next year!
I made this card using Dani's colour challenge of Baja Breeze, Certainly Celery, Chocolate Chip and Taken with Teal last month. It features my new Marker Over technique - it's new 'cos I've made up a name for it. It involves using a Stampin' Write Marker to accent parts of an image after it has been stamped which is great for jazzing up mono-coloured wheels. You can even add accents of your own ... like dots. I used this terrific (if I may say so myself) technique for my Convention swaps too! Stampin' Supplies
Ink:
Certainly Celery
Stamp sets:
Bella's Border
Occasional Greetings
Cardstock:
Baja Breeze
Certainly Celery
Whisper White
Accessories:
Certainly Celery Grosgrain Ribbon
Chocolate Chip Grosgrain Ribbon
Filigree Designer Brads
Flower Fusion Too
Ice Circle Rhinestone Brads
Stampin' Write Markers Chocolate Chip, Taken with Teal and Tempting Turquoise
Friday, May 1, 2009
I'm not here, I'm stampin'
ETA: I'm back!
Yes! I'm happily stampin' at the Stampin Up! Australia Convention right now. This scheduled post just makes it look like I busily typed away and hit the submit button today. Amazing, huh?!
So why is this being in two places at once going on? I wanted to let all my wonderful customers know that there is a Stampin' Up! May promotion. Buy any three packs of the following selected Designer Series paper for the RRP of $16.95 each and get one FREE!
| Item Number | Page | Description |
| 112042 | 132 | Urban Garden Designer Series paper |
| 112470 | 132 | Haiku Designer Series paper |
| 113976 | 132 | Pink Flamingo Designer Series paper |
| 112468 | 132 | Sweet Always Designer Series paper |
| 113992 | 133 | Tea Party Designer Series paper |
| 113975 | 133 | Raspberry Tart Designer Series paper |
| 113966 | 134 | Good Morning Sunshine Designer Series paper |
| 112469 | 134 | Holiday Treasures Designer Series paper |
| 112041 | 134 | Bella Rose Designer Series paper |
| 113974 | 134 | Bella Bleu Designer Series paper |
| 113978 | 135 | Urban Oasis Designer Series paper |
| 112461 | 135 | Washington Apple Designer Series paper |
| 112039 | 135 | Windsor Knot Designer Series paper |
| 113980 | 135 | Candy Lane Designer Series paper |
There is also a terrific Scrapbooking Starter Kit promotion for those who are interested in joining Stampin' Up! without the normal outlay and want to start out with a stash of scrapbooking products. For $150, the kit contains:
| Item Number | Description | Retail Value |
| 112231 | Schoolbook Serif Alphabet stamp set | $77.95 |
| 113059 | Simply Scrappin' Petal Party | $36.95 |
| 108697 | Earth Elements Assorted 12" x 12" Textured CS | $21.95 |
| 105216 | Pumpkin Pie Classic Stampin' Pad | $11.95 |
| 103179 | Craft & Rubber Scissors | $37.95 |
The Scrapbooking Starter Kit also contains all the business supplies contained in the standard Starter Kit:
- Getting Started DVD
- Getting Started Guide
- Guest Invitation Postcard (100)
- Idea Book & Catalogue (8)
- To My Hostess Envelope (10)
- Project Sample Sheet
- Recruit Brochures (20)
- Hostess Brochure (20)
- Hostess Benefits Form (10)
- Customer Order Form (50)


