Here is a quick tutorial on how to create your own gift card card. The key to everything is really step 4. All the measurements beforehand are just a guide - I added the measurements because I like to have the borders relatively symmetrical but I realise that this isn't everyone's priority!
If you are really organised, you can design your gift card card to co-ordinate with your gift card... 1. Size up your gift card
By my reckoning, the average gift card is 86mm x 54mm [3 3/8" x 2 1/8"]. But you may have a special card to give that isn't even a gift card ... such a club membership card that was handprinted by the local club owner's 12-year-old daughter armed with a printer and a laminator. The main aim of this step is to get a general idea of the dimensions of what you are dealing with.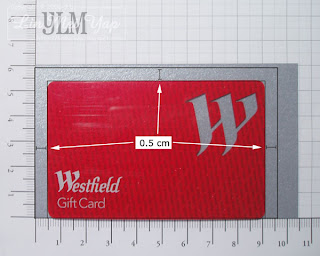 2. Determine the smallest size cardstock required
The great thing about this method is that you really don't have to measure anything but you just have to leave at least approximately 5mm [3/16"] between where the gift card finishes and three edges of your cardstock. The gift card should be flush against the opening which is why you don't have to add a margin to that edge. 3. Clip the gift card to the cardstock
This step is completely optional but I think that it makes things a little easier. I'd recommend you test your clip doesn't leave an unsightly mark if you are not planning on layering something on top of the right side of your backing. Note that the backing is upside down - ie. the opening is on the bottom but will be on the top in the completed project. 4. Apply dimensionals
Cut dimensionals in half and apply them around the gift card as snugly as possible. A snug fit prevents the gift card from moving around. Place dimensionals to support the cardstock where the ones for holding the gift card are too far from the corners. Notice no dimensionals along the opening - obvious but if you follow instructions like me, it's a gotcha!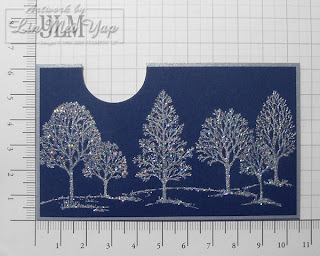 5. Decorate and punch a slot
I mounted my stamped and blinged image onto the backing that I prepared above. Then I used a 1" circle punch to create a semi-circle to make it easier for the recipient to grasp the card out of its holder.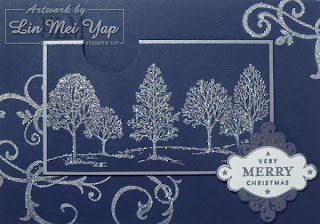 6. Mount onto card
Remove the dimensionals backing and mount the gift card holder on your card. I also added my sentiment to my card at this stage.  7. Insert gift card and secure
This is actually an important step. Nothing holds your gift card in the pocket that you created - so it could slide out quite easily. In my original version of a gift card card, I used a ribbon to hold the card in place. In this more masculine one, I slotted in the gift card and inserted a Designer Brad at the spot shown to keep it secure. And that's it!
Tuesday, December 1, 2009
Gift Card Card Tutorial
Labels:
Stampin' Dimensionals,
Tutorial
Subscribe to:
Post Comments (Atom)





6 comments:
Congratulations! I just wanted you to know that your project will appear on the Yahoo Group Late Night Stamper’s blog finds of the day for December 2. Want to receive your own copy of the blog finds of the day? Join us at http://groups.yahoo.com/group/stampinuplnstampers/
I love it. We have a Westfield Mall here too in southeast Missouri, US. I will be back to look at more stuff. I am here from the LNStampers blog.
Carey
aka Roscoe's mommy
Woohoo! You've been very generous to me, Kelly! Thanks so much for including me in your Blog Finds again.
Hello Carey! I am really glad you like it and you are most welcome to my blog!
That is amazing that there is a Westfield where you are! I imagine you'd have a great range of stores there that we wouldn't have and possibly some of ours wouldn't make it over there too. But it is neat to think that we have that in common :)
Thanks for the tutorial Lin Mei. I just got that tree set and will have to give this design a try - looks gorgeous.
Great acquisition, Sue. Lovely as a Tree is terrific for so many things. I'll keep an eye out for your creations!
Post a Comment