The zippiest way to lay down stamped images is through the use of Stampin' Around Wheels. These come in two widths - standard and jumbo. Of course, since jumbo means jet, it is the faster of the two... Anyway, moving right along... For today's patterned paper, I'm using the Basic Outline jumbo wheel. This is a great wheel when combined with the Bud Basics stamp set since you can add lots of colours with minimal effort. No fussing with markers or painstakingly colouring sections of stamps whilst cursing the clumsiness of having an inkpad as a nib. 1. Run the wheel across the page (in any parallel direction) until the page is covered in impressions. An ink cartridge makes it easy to stamp continuous images from one side of the paper to the other. To break up the continuity of the empty vertical patch on the right side of the page (oops!), I inked a few dots from Itty Bitty Backgrounds and stamped a few times. It should not be so obvious in the next picture.
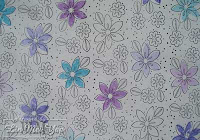 2. À la two step stampin' technique, use the base large flower stamp from Bud Basics to fill in the outlined large flowers. I've stamped twice with each inking of the stamp - if possible, the first impression on a whole flower so that I don't have a dark patch on the second impression. Leave a couple of the flowers white if you want a bit of lightness in the end product.
 3. Stamp with the base leaf stamp from Bud Basics next. The reason I do this before the small flowers is that I'm introducing two greens into the colour mix. The large flowers establish the major part of colour scheme and you are adjusting the color balance by the addition of the leaves (a little more yellow by using Gable Green, a little more blue by using Glorious Green).
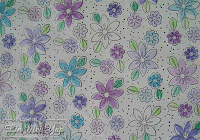 4. Stamp with the base small flower from Bud Basics over the small flower outlines. I've stamped three times with each inking of the stamp and left none white. I think the paper could be considered a finished product at this point (especially if you coloured all the flowers) but I'll add a little extra colour.
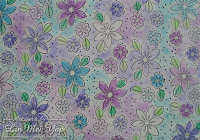 5. To add colour to the areas around the flowers and leaves, use a sponge dauber dabbed on an ink pad. The first tap on to your paper should be the lightest (imagine being a feather landing on the page). Increase the pressure of the taps as you go. Then, after re-inking, start lightly again. This avoids having really obvious round spots in the colour cloud surrounding the flowers and leaves.
Stampin' Supplies
Ink:
Basic Black ink cartridge
Gable Green
Glorious Green
Lovely Lilac
Orchid Opulence
Tempting Turquoise
Stamps:
Basic Outline wheel
Bud Basics set
Cardstock:
Ooooh! Non SU! white copy paper...
Accessories:
Jumbo wheel handle
Sponge daubers
It's all wheelie...I mean...really easy, right? I'm off to wrap something with it. I'll post the package tomorrow along with unwrapping the May Stampin' Up! offer.
Update 12:29pm
I've found out that there is another patroness also responsible for pointing visitors my way. Many many thanks Vivian Swain!
Wednesday, April 30, 2008
Rolling your own
Labels:
Bold Brights,
Patterned Paper,
Tutorial,
Two Step Stampin',
Wheel
Subscribe to:
Post Comments (Atom)






4 comments:
oooh, this looks awesome! Love the colours too ;-D
We're sisters in purple, Carol - it is my favourite colour.
Thank you so much for your great tutorial! I've been wanting to try this and now I can! I actually have this stamp set and wheel! Yippee!
I found you thru my upline, Vivian! She is such a great asset...encouraging us and promoting others!!!
Thank you again,
You're most welcome Susan - to my blog and for the tutorial. I'm sure that you'll have a ball with the Bud Basics and Basic Outline combination. Vivian has been incredibly generous to point out unknowns like me. I've had more traffic in the last few days than the last few weeks combined. But I am prepared to sink back into obscurity when the limelight moves...at least that is what I have been telling myself!
Post a Comment